Your guide to successful composting.
Did you know that up to 45% of households waste going to landfill is food waste? Composting and worm farming is a great way to reduce your food scraps going to landfill, helping to reduce your household emissions, and best of all producing a healthy and nutrient rich material which can be added to your garden.

What is compost?
Compost is produced by microorganisms (worms, fungi, insects and bacteria) that feed on organic material such as food and garden waste, breaking it down into smaller and smaller pieces resulting in a product called humus, a dark soil like material that is rich in nutrients, holds moisture and improves soil structure.
Composting or worm farming – what’s the difference?
There are a number of methods and equipment you can use to compost your waste depending on your personal preference, location, size of garden and amount of kitchen waste produced. There is a product available for all homes, from apartments up to acreage properties so you are able to compost on any scale. Read about the pros and cons of each system below.
|
System
|
Pros
|
Cons
|
|
Compost bin/tumbler

|
Able to take a wide range of kitchen scraps and garden waste
Available in different sizes to suit your needs
Takes garden waste as well as food scraps
Can be expanded to ensure constant supply of compost
|
Open bottom bins need a garden bed to place on so not suitable for courtyards or balconies, however tumblers are OK
Take time to break down into useable compost
Can become smelly if not managed properly
Can attract pests
|
|
Worm farm

|
Suitable for properties without a garden
Can be kept indoors
Clean and not smelly
Breaks down food quickly into a product that can be used on your garden plants
|
Need the right spot so the worms do not overheat or get too cold
Cannot process large amounts of scraps
Some scraps (e.g. onion, citrus) are not suitable for the worms
|
Composting – how to get started
Setting up a compost bin is very easy; you just need to follow a few guidelines.
- Location, location, location! Place your bin in a well-drained spot out of full sun. Ensure there is plenty of room to access the bin to fill, and also when you need to empty out that amazing compost! Bury the bin up to 10cm into the soil to keep out pests.
- Prepare the layers - Building the contents of your bin is a bit like making a lasagna, success will depend on the mix of ingredients added at the right ratio. First up, place a layer of brown (high carbon) materials at the base, such as twigs, leaves, mulch or shredded paper. Water in well. Next add a layer of compost, soil, manure or potting mix to start off the process.
- Add those scraps: You are now ready to start to add materials to your compost. As you add materials to the compost, make sure to add equal amounts of green and brown material (see guide below) – just like making that lasagne!
- Harvest that brown gold – Once your compost is dark with a nice crumbly texture it is ready to use. To check, lift up the bin and remove the ready compost using a shovel, any material that is not broken down can go back in the bin.
|
Brown materials (carbon based)

Dried leaves
Dried garden prunings (not too big)
Dried grass clippings (small amounts)
Shredded paper and card
Straw and sawdust
Hair (pet and human!)
|
Green materials (nitrogen based)

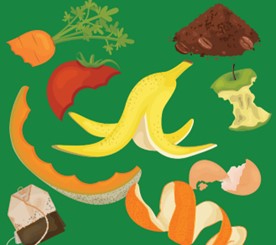
Fruit and veg scraps
Tea leaves (not teabags as these are likely to contain plastic)
Coffee grounds
Dead cut flowers (chopped up small)
Other food scraps (no meat or dairy)
Weeds (no seeds)
|
Top tips for looking after your compost bin
- Maintain a balanced diet! Ensure you have an even mix of brown and green matter, you can add shredded paper or cardboard if you don’t have garden waste
- Mix the compost regularly to ensure it is well aerated, ensuring it is well mixed and breaks down quicker. This can also reduce issues such as smells that are caused by anaerobic compost (i.e. no oxygen). You can use a compost aerator (like a big corkscrew) or a garden fork.
- Check the compost is nice and moist, a bit like a moist sponge, not too wet or dry.
- Check regularly for pests, insects such as worms and other small flies are fine and means your compost is alive.
- Once your compost bin is full, it needs to be left for six to eight weeks to allow it to break down. Continue to aerate and keep moist. You could set up a two-bin system - as the first one becomes full and left to mature you can start filling the second one. This means you will always have a compost bin on the go.
Worm farming

Worm farms are a great idea for smaller gardens or households, even areas without a garden such as apartments can easily accommodate a worm farm. You can even set up a worm farm indoors, in a garage, on the patio or balcony.
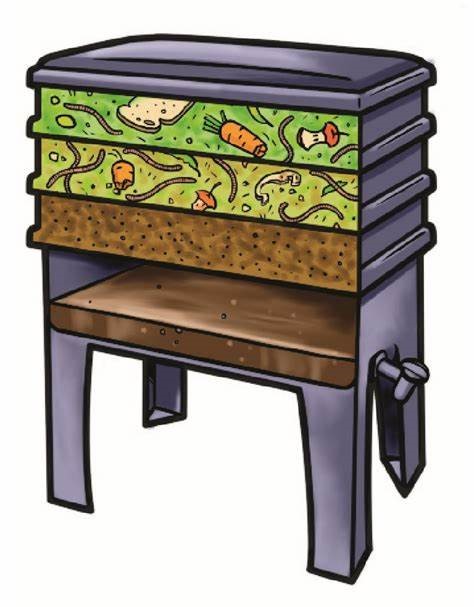
Worm farms use special worms that eat their way through your food scraps, breaking it down into nutrient rich products (worm poo and wee/tea!) that can be used to feed your plants. There are a number of different worm farms on the market, or you can even make your own quite easily using waste materials, or even old wheelie bins.
To set up your worm farm follow the instructions provided, making sure to follow the below guidelines to keep your worms happy and healthy.
- Find a convenient and shady position, this can be in the garden, courtyard, balcony, garage, laundry – wherever it can be easily accessed really!
- Assemble the worm farm following the instructions, filling the worm’s home with the bedding provided. The top tray is where you will place your food scraps.
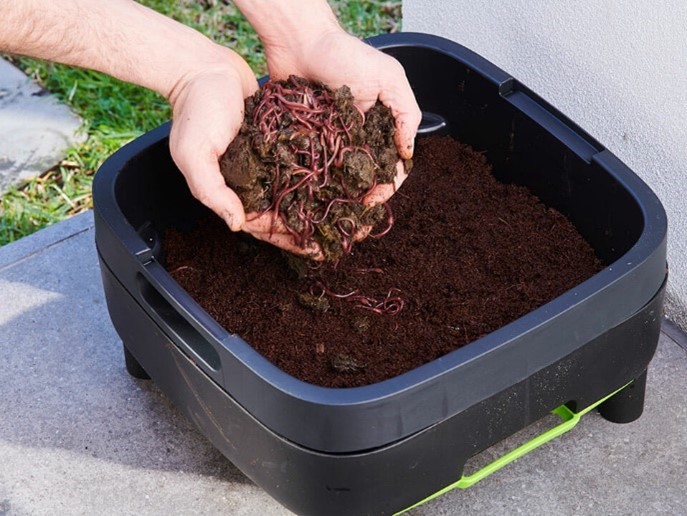
- Add the worms to the home tray (the worm’s living room/bedroom!)
- Begin to gradually add well chopped up food scraps, a little at a time, use a small hand tool to dig in and aerate the soil. Make sure scraps are not too big as the worms only have small mouths! Too much citrus and onions can be harmful, but small amounts are generally fine.
- Once your worms start to munch through the scraps and the top tray fills up you can start harvesting the worm castings. These can be placed around your potted plants, dug into vegie beds, or mixed in with compost/potting mix. The liquid (worm tea) can be diluted with water to feed your plants.
- Where to get worms? - check out this local supplier here
What's wrong with my compost?
|
Material not breaking down
|
There are still large scraps in the pile, and it does not look like compost yet
|
Aerate your compost regularly
Make sure you have an even mix of browns and greens
Check the moisture levels
Chop up contents into smaller pieces so the organisms can eat them quicker!
|
|
Pests
|
Rats/mice
Flies and maggots
|
Rats or mice may enter the bin from the bottom. Place the bin on mesh and dig into the ground.
Ensure the lid is secure.
Avoid any foods such as meat, dairy and grains that may attract vermin.
Small flies and maggots are usually vinegar flies. These are not a real problem. To deter them add brown material to the top of the pile, or sprinkle over some garden lime. Too much acidic material (e.g. citrus) should be avoided.
|
|
Smelly
|
|
Increase aeration
Check the compost is not too wet
Add some garden lime or dolomite
If the worm farm starts to smell, stop feeding for a while to allow the food to break down, aerate the soil regularly to mix in the scraps, do not add large scraps as they will likely go mouldy before the worms can break them down
|
To download a copy of this information in pdf format click here